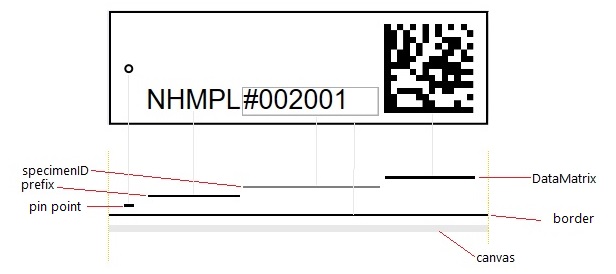
By learning about the structure of the label template in EntomoLabels, you will understand why sometimes you click on an object and a different one is selected, not necessarily the one you clicked on. In the graphic below you can see the template „from above” and its side layered cross-section.
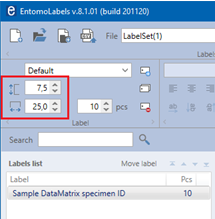
When starting to design a template, we set its size – with the use of controls to set its width and height.
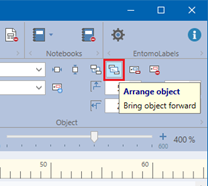
Then we add any number of elements to the template, specifying their parameters (eg size, position, font, line thickness …) using the controls assigned to them. Each added object constitutes another layer of the template. You can view the current order of layers:
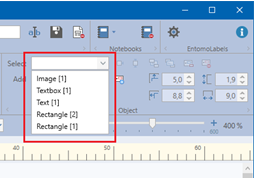
The layers are sorted from lowest to highest.
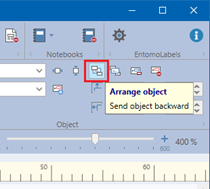
By selecting any object – you can use the „Move Forward” and „Move Backward” buttons to change their position by moving up or down.
The position of objects (layers) is important because they can obscure each other. For example, if the top layer is a rectangle filled with a certain color – it will cover the objects below – making it impossible to select them with the mouse. Then a given object can only be selected by selecting it from the list of objects (Object -> Select – on toolbar).
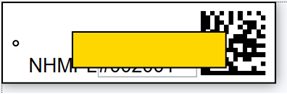
Moving this rectangle to the end of the list of objects will give us the following effect:

Note: Manipulations on label objects concern one specific label from the list of added labels, they do not cause changes in the template. For the changes to take effect – the template must be saved:
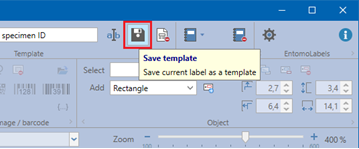
From now on, each label added based on this saved template will have the appearance and properties – just like saved in the template.